
I’m back again, and it’s about time too. Last time, I left off with a half-completed SD-EX 00 Gundam. Let’s finish it up.

Check out those legs. Green stickers go on the outside of each leg. Panel lines got a bit messy, but with the entire thing put together it was a lot less distracting than I first thought it would be. I think I cleaned it up a bit after this photo even. Q-tips always saving my ass.
And for those of you wondering “WHAT ARE THOOOOOOSE?” there’s a bit of a story behind our friend’s Sonic the Hedgehog-esque shoes. Every traditional Gundam color-scheme SD-EX model I’ve built molds the feet entirely in red and gives you white/black stickers for the top of the feet. These usually look a little cheap, so this time I wanted to see what it would look like if I just panel-lined the feet instead. Note that in the photo above I didn’t panel line them yet, just the legs. I probably should have panel-lined them before even attaching them to the legs, but oh well.

While the panel lines dried on the legs, I took a moment to assemble the upper-half. Eagle-eyed readers will notice the added stickers on the torso compared to my last blog’s photo. I’m really liking the lining on the face and arms, but the shoulders could have probably been cleaned up a bit more. The SD-EX Exia’s shoulders were rough for me to panel-line for the same reason: The curves and indents are pretty subtle and your hand can slip way too easily. As for stickers, the white one on top of the torso is… crude, to say the least, but in my opinion the rest of them are fine. I actually really like how the head stickers turned out. I was a little anxious with the V-fin one especially, as the SD-EX Aile-Strike comes with the same type of sticker and I didn’t line it up quite as nicely. But this one turned out pretty good!

Here’s, uh, the waist. These things feel like afterthoughts in a lot of kits I’ve built. Complex skirts have a habit of popping off when posing kits, so I understand the desire to make them sturdier by using as little parts as possible, but they’re often not very exciting as a result. That being said, deep down I look forward to building them because they’re often the last thing you do. They’re a light at the end of the tunnel. They’re the foundation that lets you slap together the rest of the kit!

And here it is! Nice, but… a little bland without any gear. Also I regret not using those shoe stickers, but I’ll keep it as is. Experimentation can be its own reward, and part of what I love about gunpla, even if I don’t paint or do a lot with the kits, is the little personal touch to every build.
As the marketing tagline/meme saying goes, “Gunpla is freedom.” It’s corny, but after building a kit or two you start to see where that came from. Maybe you put a decal or two in a different place than the manual says. Maybe you use markers to fill in the tiny spots you’re supposed to cover up with stickers. It’s all up to you. Sometimes, by breaking out of the guidelines you learn just why those guidelines were set in the first place. That’s how I feel about these red kicks. I could easily fix this up by slapping those stickers on even after the panel-lining, but I want to be able to look at my shelf, glance at my SD-EX 00, and fondly look back and say, “Man that was a dumb idea.”
I can be weirdly sentimental about minute shit sometimes, I know.

Anyways, back to that gear. The 00 Gundam’s backpack has attachable GN shields that do a lot to build its profile. I didn’t bother with panels on the back because with how my display is set up ain’t nobody ever seeing that shit. The stickers for the shield blades (God that term is such a dumb thing to have to type) are fine, the conical white ones for the GN drives… less so. Mr. Stark, they don’t look so good. :<

Despite the sticker kerfuffle, we’ve managed to make this chibi weapon on war 100x cooler with only like 5 more pieces of plastic slapped on the back. I’m really digging the intimidation factor added to the kit in this photo by the hard light source of my window coming in from the left. That was a complete accident!

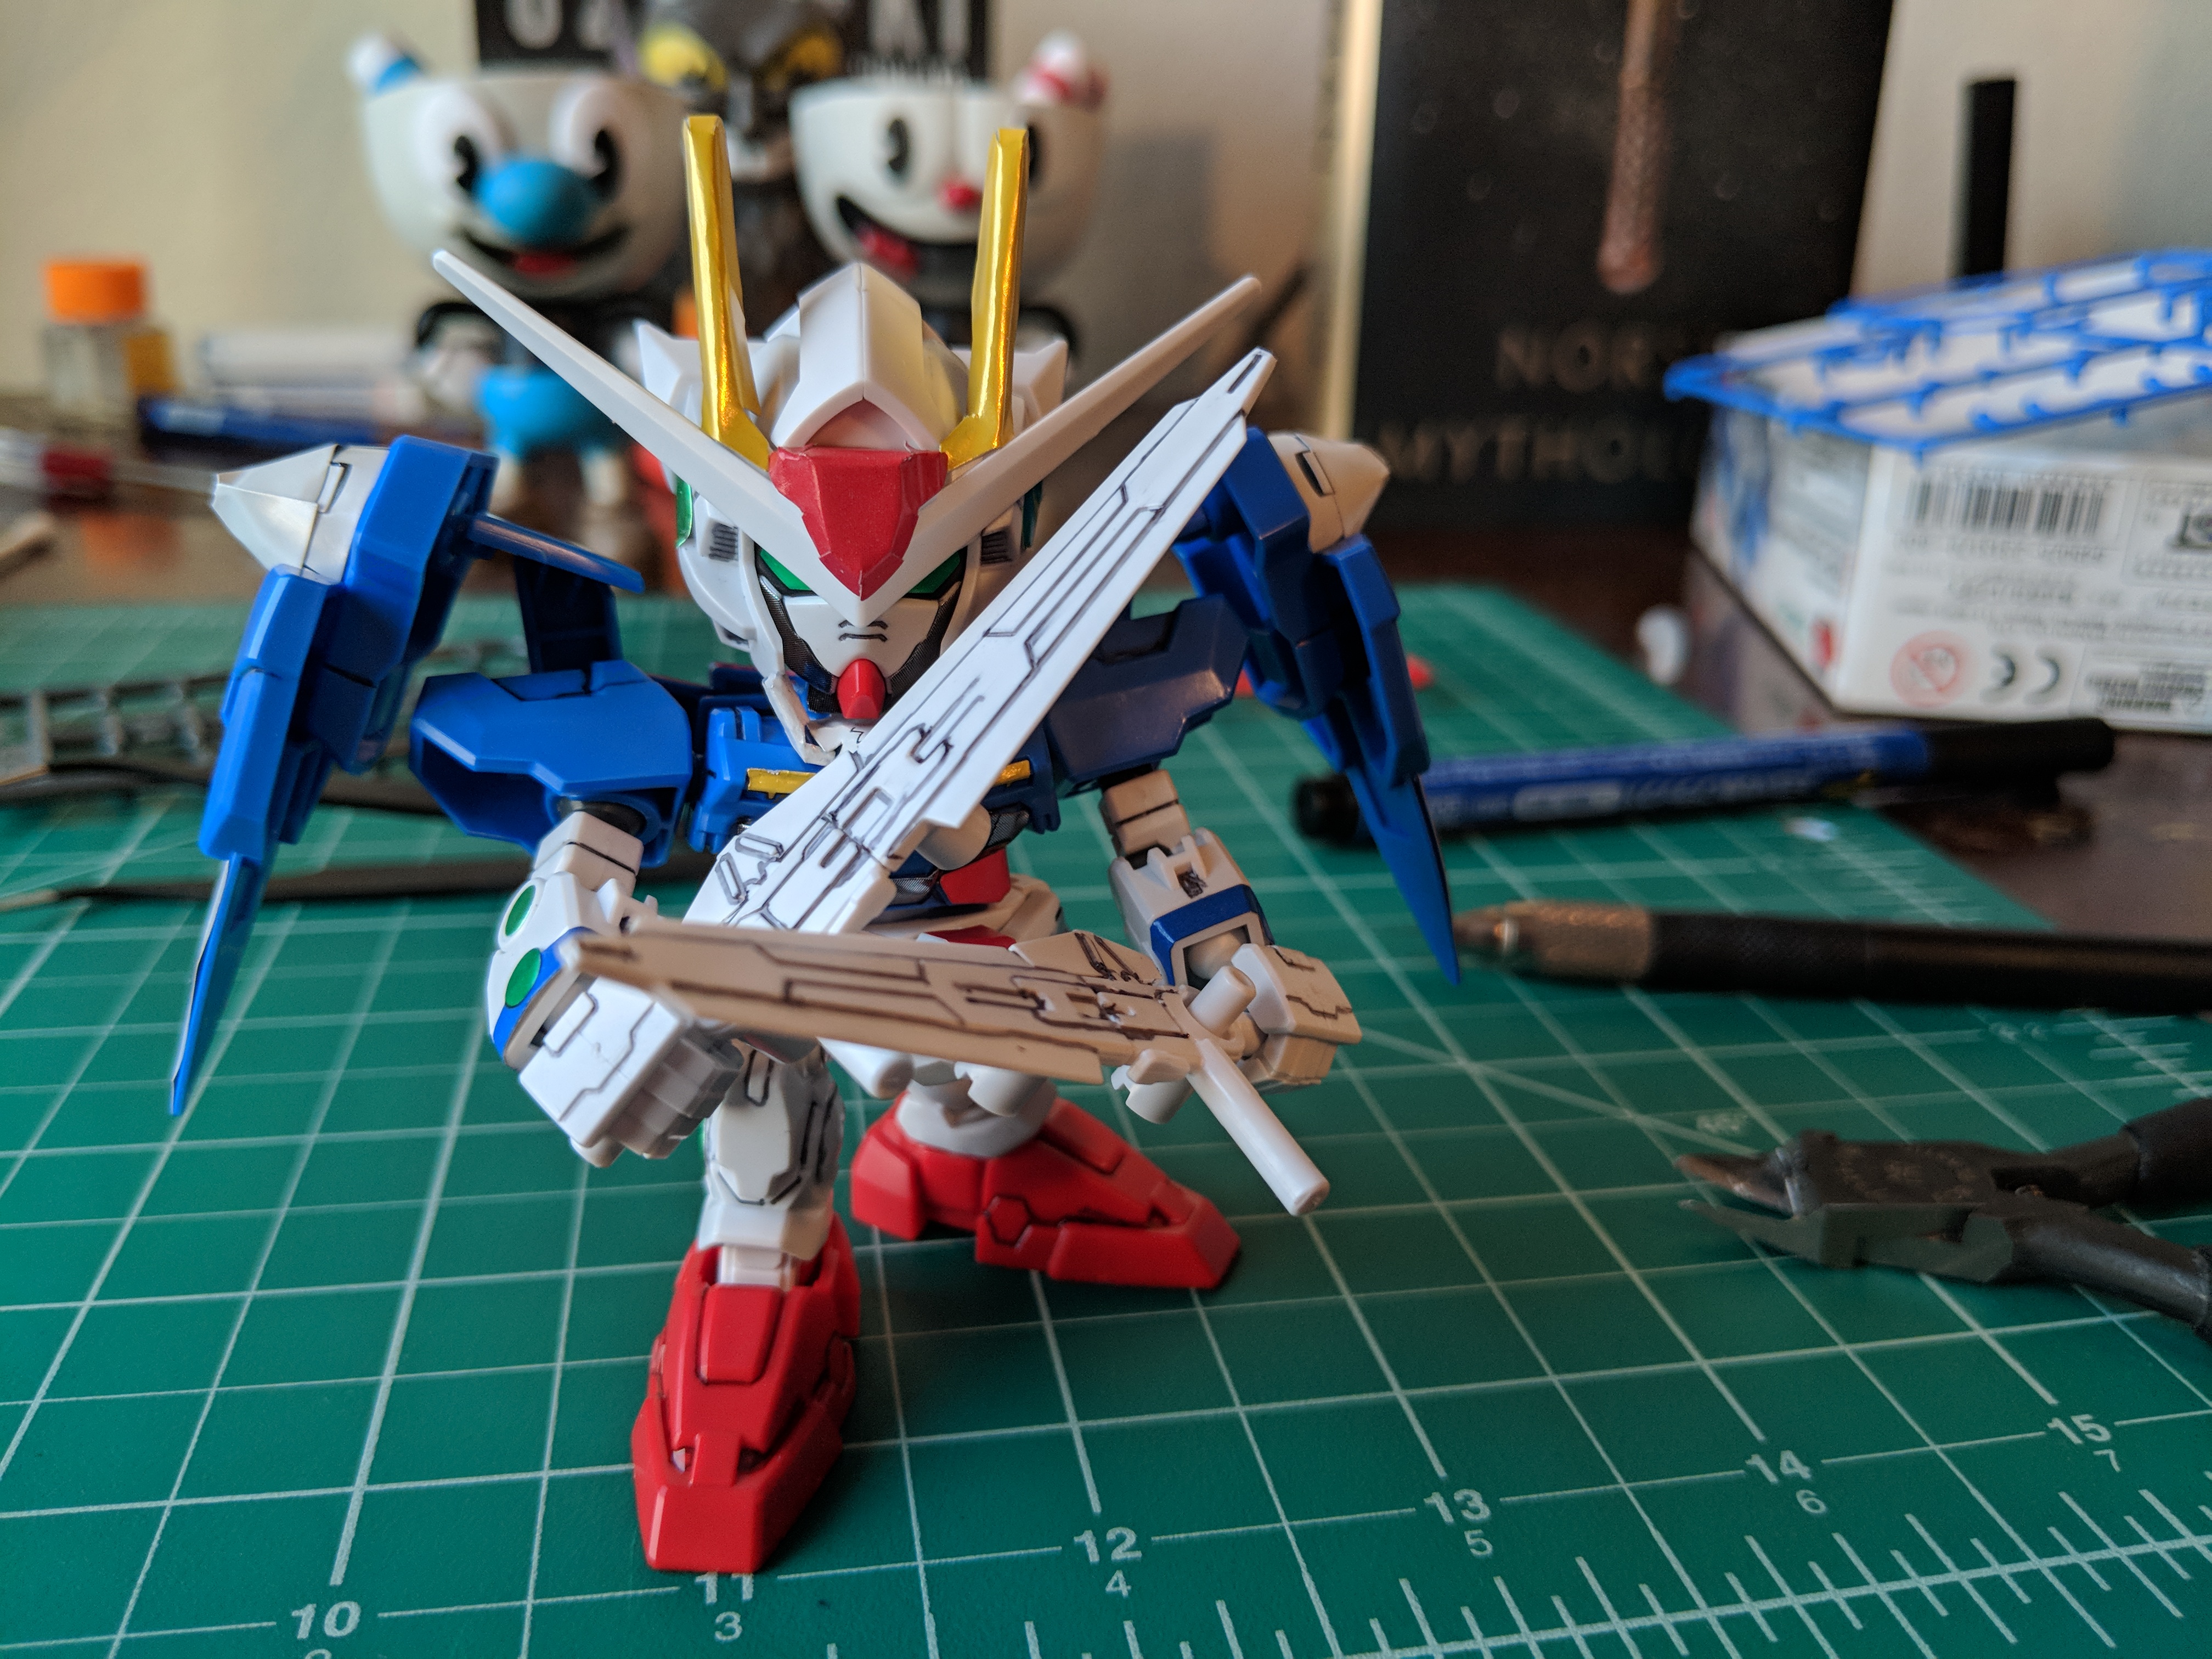
And of course, the GN-Sword IIs. I completely ignored these on the Exia kit because I love the GN Sword I and III so much more and I didn’t feel like bothering with the hassle of putting them on the tiny kit’s side skirts. Panel-lining these were a PAIN IN THE ASS but ended up being super worth it because they turned out great. Absolutely love the detail on these weapons, especially for a kit line infamous for cutting corners.


Absolutely lovely. The backpack and weapons added a lot – this went from a fairly bland kit to a much more dynamic and exciting one after slapping on the extra equipment and doing a little bit of posing.

And there’s another one for the book shelf, right next to its SD-EX siblings.
I hope everyone enjoyed this two-blog escapade. Let me know if you have any topic recommendations for gunpla blogging! I’m still not quite sure how I want to divide this up in terms of making this blogs vs making a video, so let me hear your thoughts. At some point this summer, I do want to take a crack at painting with those tiny little spray cans they sell. Only problem is it’s Wisconsin and those are only really able to be used for half of the year here, so I’d have to do that at some point before fall. Hopefully I can get around to it! Goodbye for now.